Crochet club: Pretty hanger covers
Published on April 15, 2019 By Kate Eastwood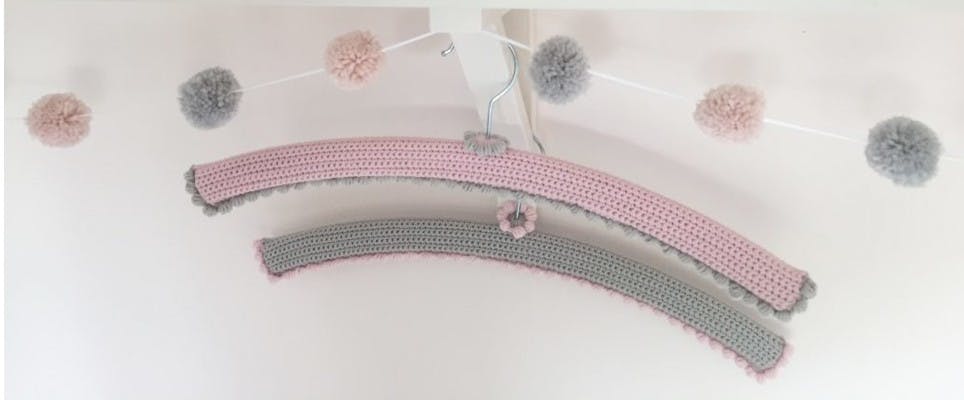
Adding crochet is a wonderful way to make any household object pretty. Kate Eastwood has transformed some old wooden hangers with a whoosh of her hook!
Materials
- MillaMia Naturally Soft Merino
- 1 ball each of Cloud Grey (127) and Petal (122)
- KnitPro Waves Crochet Hook
- Size 3.00mm
- Wooden crescent shaped hangers (42cm)
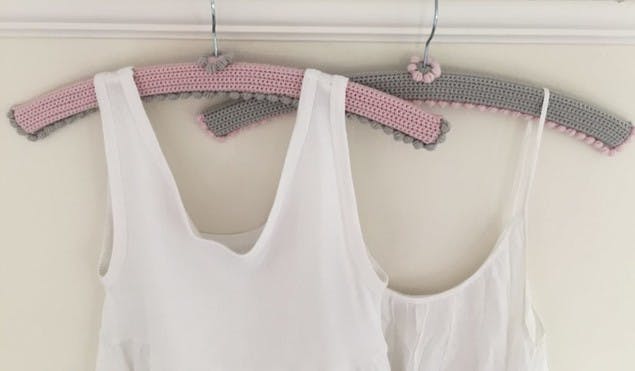
Our grandmothers would have scolded us for using plastic coat hangers, and been horrified by wire hangers – for the simple reason that they are not good for our clothes. They leave creases and dents, stretch your clothes and wire hangers especially are simply not strong enough to support most garments. Kate’s gorgeous crochet covers will help to protect your clothes and look stunning in your wardrobe.
Abbreviations (UK terminology)
Sts - Stitches
Ch - Chain
DC - Double crochet
Sl St - Slip stitch
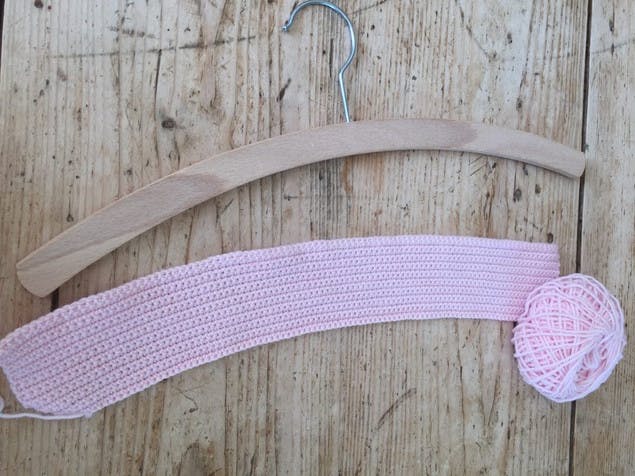
Getting started
The first stage of making the cover is to make a rectangle in DC.
To do this, work a chain of 101 sts and starting in the second chain from the hook work 1 row of DC.
At the end of the row chain 1 and turn.
Work a further 18 rows as above.
Finish off and sew in your ends.
Working around the hanger
To find the central point of your rectangle, first fold the rectangle in half length-ways, and then again from top to bottom. The pinch point is going to be the center point.
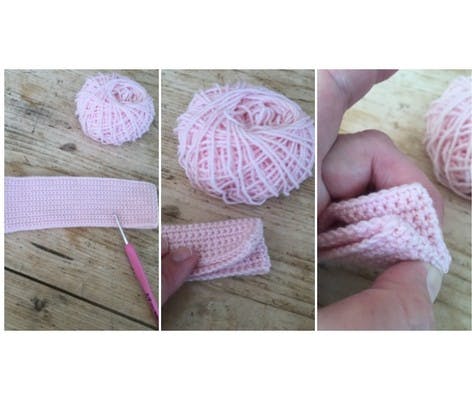
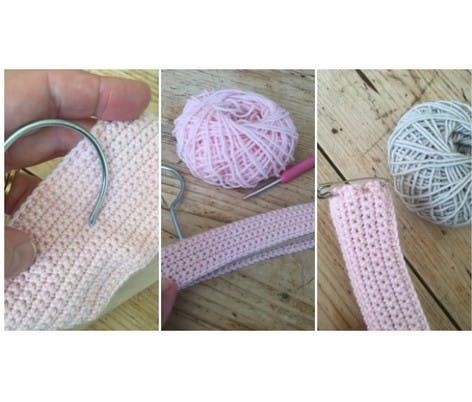
Now join in your second color and work a round of DC to join the two sides of the cover together.
Pro Tip
Work 2 or 3 DC into each of the two corner stitches to prevent the cover from becoming too tight and out of shape.
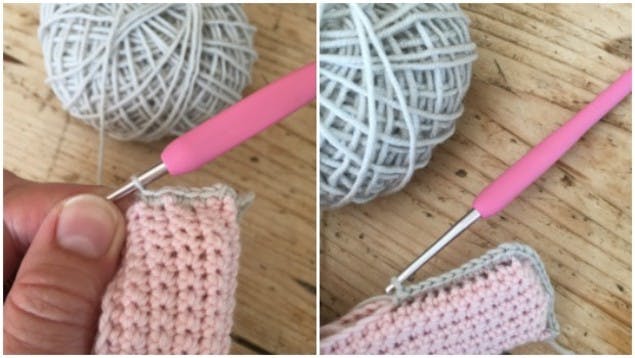
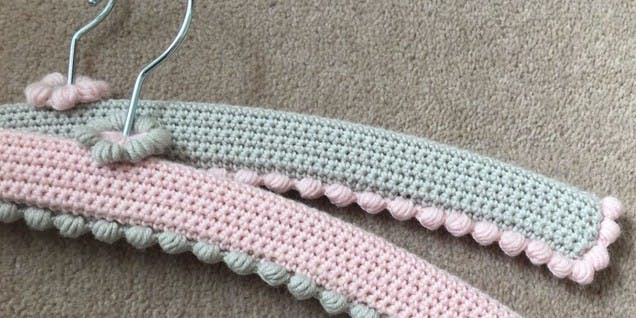
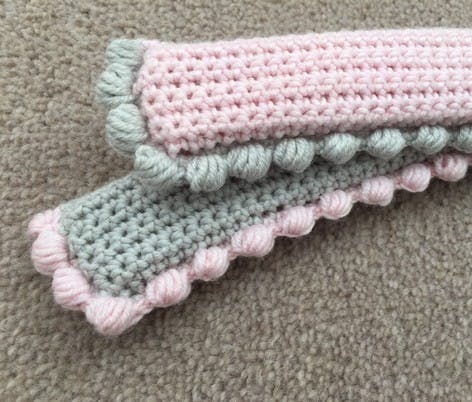
Adding the border
You are now going to be working a row of puffs/bobbles, so do not fasten off the yarn, but simply turn your work so that you are working this next row on the reverse.
Once you begin making puff stitches you will see that although you are working on the reverse, when you look at the edging from the other side the finished effect will be on the right side.
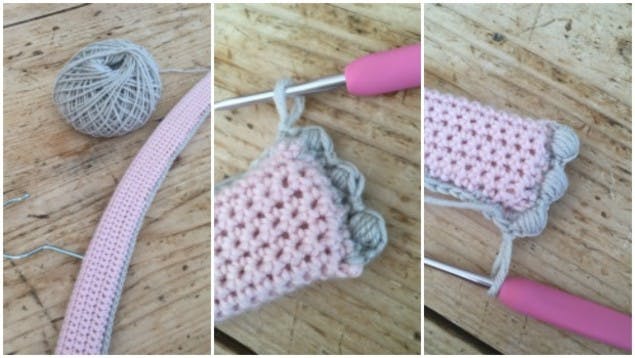
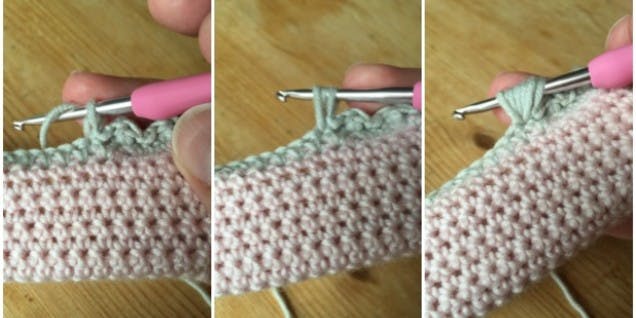
Working the bobble row
1
Begin the row with a DC and then make a puff/bobble as follows:
Yarn over and working in to the next stitch, pull the loop back through to approx TR height
Repeat this 4 more times, all in to the same stitch.
Yarn over and pull through all the loops.
Chain 1.
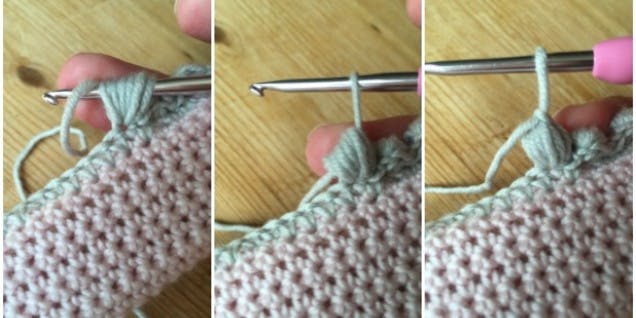
2
Sl St in to each of the next two stitches and repeat the puff pattern.
Continue working this pattern of a puff stitch followed by 2 Sl St all the way to the end.
Finish off and sew in your ends.
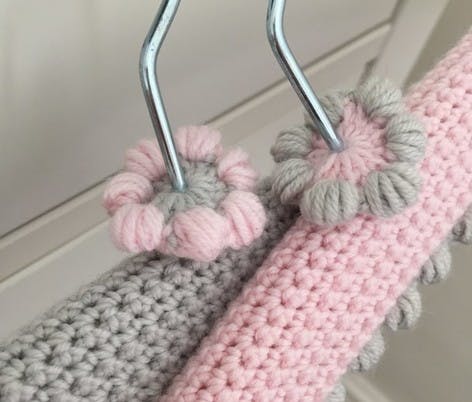
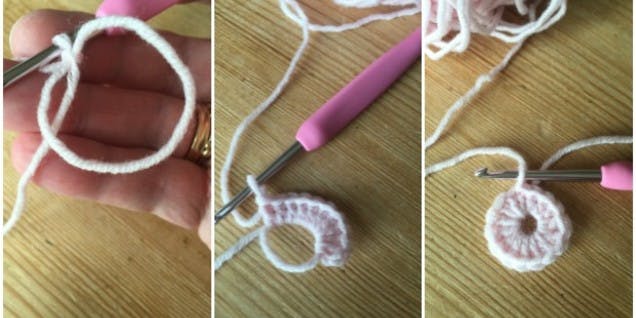
Making the puff flower
1
Make a Magic Ring, chain 2.
Work 14 TR in to the ring.
Finish off and sew in ends.
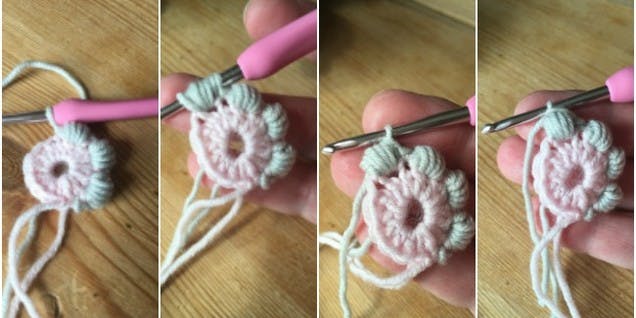
2
Join in your second color at any point and work a SL ST.
Into the next stitch work a puff, Sl St into the next stitch and then work another puff.
Continue this pattern all the way around until you have 7 petals.
Join with a Sl St, finish off and sew in ends.
3
Carefully push the flower onto the hanger hook through the center hole in the flower.