Crochet with Kate: Meadow Picnic Blanket!
Published on August 15, 2015 By Merion 2 min read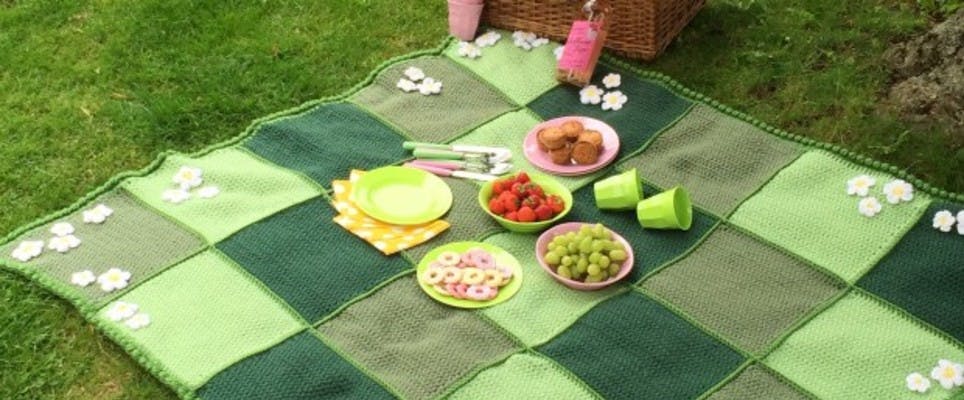
Our Kate, brilliant blogger at Just Pootling and designer of fabulous tutorials, has created a picnic blanket for you with a dual purpose that will keep little children amused for hours!
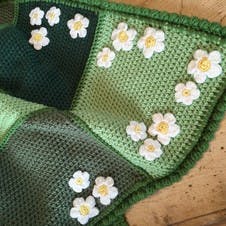
When the sun shines, is there anything more perfect than packing up a picnic and heading out for a little al fresco eating? This Meadow Picnic Blanket has to be the ultimate in this year’s must-have picnic accessories, and with its ready made fields and daisies it could even be spread out and used inside should the weather turn cold! The blanket is made up of 25 squares. Each square measures approximately 29 cm x 29 cm and uses one ball of Paintbox Yarns Wool Mix Chunky yarn (110 m/120 yards).
The finished blanket measures 155 cm x 155 cm. I used Paintbox Yarns Wool Mix Chunky for my blanket, but any bulky yarn would work just as well.
Materials
- Paintbox Yarns Wool Mix Chunky
- 9 x Paintbox Yarns Wool Mix Chunky in Lime Green (1028)
- 8 x Paintbox Yarns Wool Mix Chunky in Pistachio Green (1024)
- 8 x Paintbox Yarns Wool Mix Chunky in Evergreen (1030)
- 4 x Paintbox Yarns Wool Mix Chunky in Spearmint Green (1025)
- 1 x Paintbox Yarns Wool Mix Chunky in Daffodil Yellow (1021)
- 1 x Paintbox Yarns Wool Mix Chunky in White (1000)
- Pony Bamboo Crochet Hook
- A 6.5 mm crochet hook
- A 6 mm crochet hook
Abbreviations (UK terminology)
htr half treble crochet
ch chain
st(s) stitch(es)
dc double crochet
sl st slip stitch
tr treble crochet
ws wrong side
yo yarn over
Note: The squares are worked in htr and I used a 6.5 mm hook. The second round of the border is worked with a 6 mm hook.
To make the squares:
1
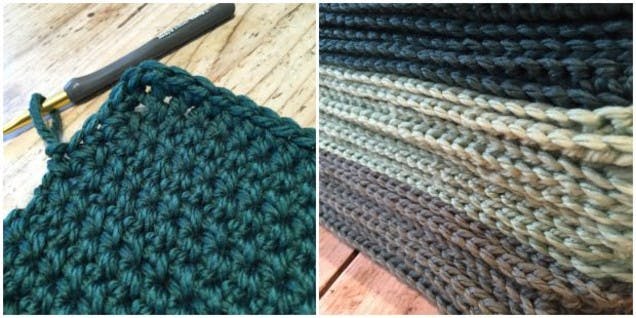
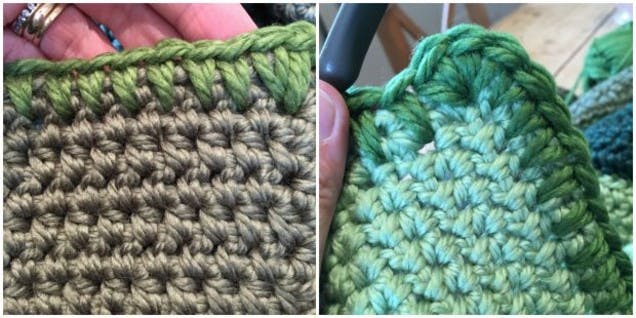
Let's get started. Ch 31. Working your first stitch into the second chain from the hook, work htr all the way along the row. At the end of the row ch1 and turn. Work row to form a square ending with a RS row.
2
Finish the square. At the end of this row work 2 dc in to the corner st and continue working one round of dc all the way around the edge of your square so that all four edges are neatly finished off.
3
Make more squares. Cut yarn and then sew in the ends. Make the correct number of squares in the various greens. Once all of your squares are completed lie them out in the color order that you want them.
4
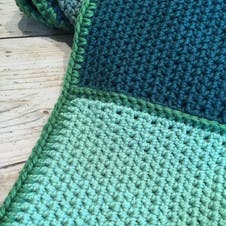
Pin them. Pin the strips of squares together. I worked from bottom to top first and then from right side to left side.
5
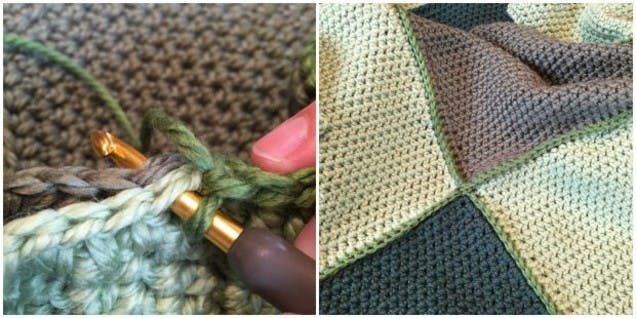
Join them. Join the squares together by working dc all the way along each row.
Pro Tip
Make sure you end up with 9 x squares in Lime Green, 8 x squares in Pistachio Green, and 8 x squares in Evergreen.
To make the border:
1
For round 1. Take your Spearmint Green yarn. Working with a 6.5 mm hook work all the way around the entire edge of the blanket in dc. To create a blanket stitch effect, work your dc into the second row of sts down along the top and bottom edges, and two sts in on the two side edges.
2
For round 2. Work a round of regular dc all the way around – sl st the last st into the beginning of the previous round.
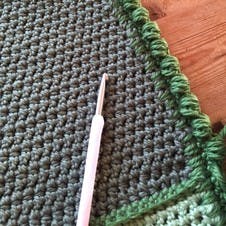
3
For round 3. With the ws of the blanket facing you, sl st into the next sl yo and pull through, yo and pull through, yo and pull through, yo and pull through (4 x times). You will have nine loops on your hook. Yo and pull through all nine loops. Sl st in to the next st, repeat bobble pattern in to the next stitch, sl st, and so on all the way around your blanket.
4
Finish it off. At the end of the round finish off with a sl st, cut yarn and sew in ends.
To make the daisies (small & large):
1
To make the small daisy. Using your Daffodil Yellow yarn, make a magic ring, work 5 dc into the ring and pull the ring closed.
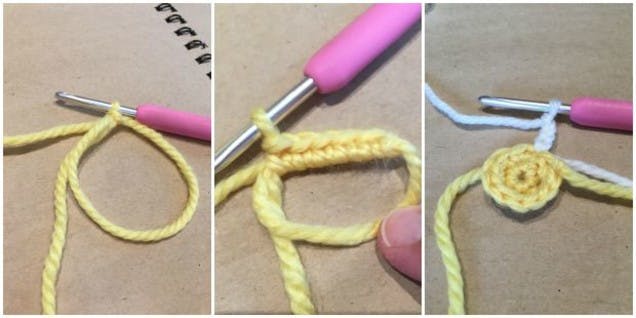
2
Add second color. Join in the Paper White yarn and *ch 3. Work a further 3 tr into the same st, leaving the final loop of each tr on the hook. Yo and pull yarn through all four loops.
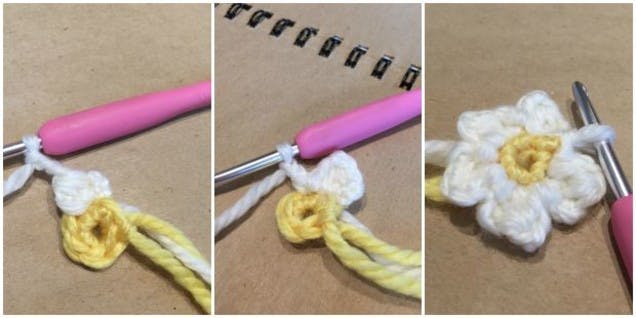
3
Make the first petal. Ch 3 and sl st in to the same st. Work from * to * to repeat petal.
4
Repeat and finish. Work 5 petals in total, finish with a sl st to join, cut yarn and sew in ends.
5
To make the large daisy. Join in the next color * Ch 3 and then work a further 4 tr into the same st, leaving the final loop of each tr on the hook. Yarn over and pull yarn through all 5 loops. Ch 3 sl st into the same st. Sl st into next st. Sl st in to next st and repeat from *
6

Repeat and finish. Make 5 petals in total, sl st to join together, cut yarn and sew in ends.
7
Decorate your blanket. Place the flowers strategically on the blanket and stitch into place!
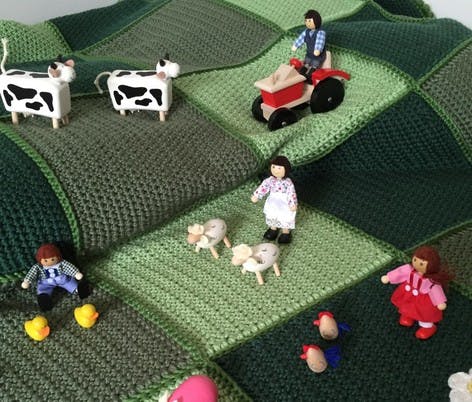
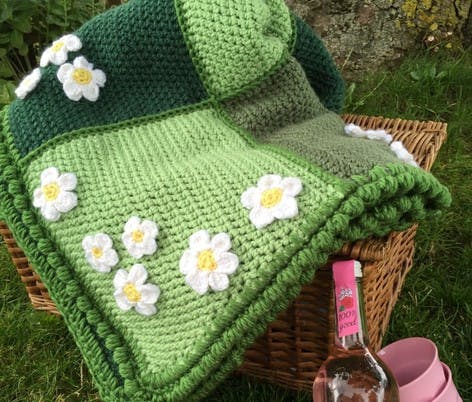
And there you have it: your Meadow Picnic Blanket is complete. You’re now ready for a sophisticated alfresco lunch with friends or family. Or delight your children and grandchildren with the best ever farm playmat!
Feel free to use any bulky yarn you like, and mix up the colors too if you'd prefer an ombre yellow, a gorgeous range of pinks, or a multi-colored rainbow delight. Pick any colors of the Paintbox rainbow - there are a fabulous 60 shades to choose from! And if you'd prefer to go all acrylic over a wool blend, choose Paintbox Yarns Simply Chunky instead. Happy crocheting!