Crochet club: Beautiful bobble cushion
Published on April 15, 2019 By Kate Eastwood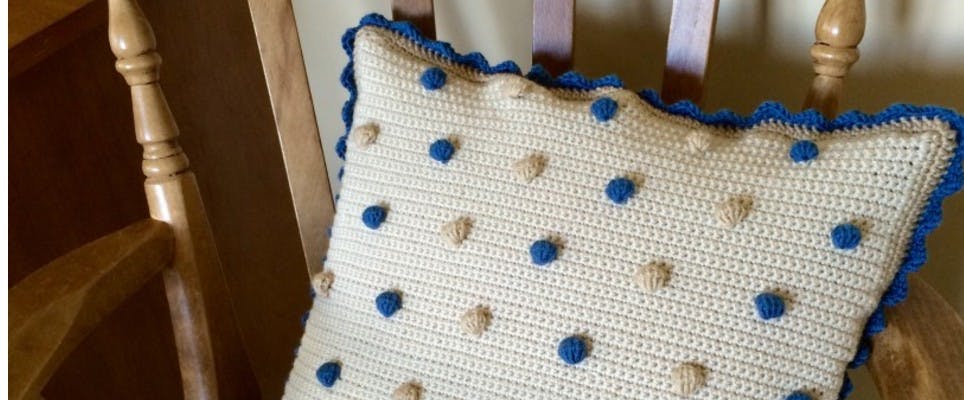
Kate Eastwood of Just Pootling is here to show you how to create stunning bobble cushions to adorn your living space.
Materials
- Debbie Bliss Rialto DK
- 4 balls in shade Ecru (2)
- 1 ball each in shades Stone (6) and Ocean (72)
- KnitPro Waves Crochet Hook
- Size 4.00mm
- Rico Pillow Insert Large Square
- 3 large buttons
Abbreviations (UK terminology)
Ch - Chain
Sts - Stitches
DC - Double crochet
TR - Treble crochet
HTR - Half treble crochet
RS - Right side of work
WS - Wrong side of work
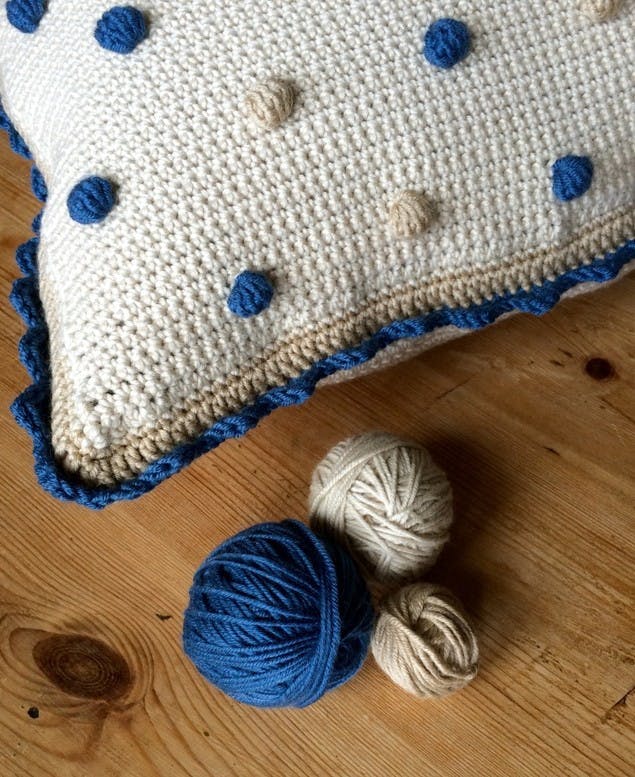
These cushions are a delicious way to bring a bit of fun to your home, whether they are for your bedroom, lounge or snug. They are simple to make and better still, they don’t take vast quantities of yarn!
Kate uses Debbie Bliss Rialto DK, which comes in an amazing array of colors so feel free to pick the perfect shades that match your home's color scheme.

Making the front of the cushion
Foundation
Make a starting chain of 73 sts.
Work the first DC into the second chain from the hook and continue in DC to the end.
(71 sts) Turn.
Remember throughout the cushion cover to Ch 1 at the beginning of every row.
Work a further 5 rows in dc.
Your 6th row is going to be your first row of bobbles and this will be called Pattern Row 1.
How to make a bobble
Work the correct number of DC for the row, your bobble is going to be made into the next stitch.
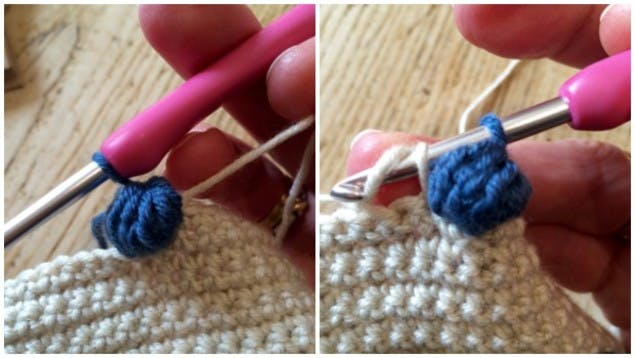
Join the colored yarn that you are using for your bobble (leaving the main color still attached but just pulled to the back) by putting your yarn over the hook and working a treble in to the next stitch.
Do not work the last pull through loop of your TR.
You need to work 7 TR in to this one stitch in total, leaving the last loop of each TR on the hook.
You should be left with the loop from your last DC stitch and 7 TR loops on your hook.
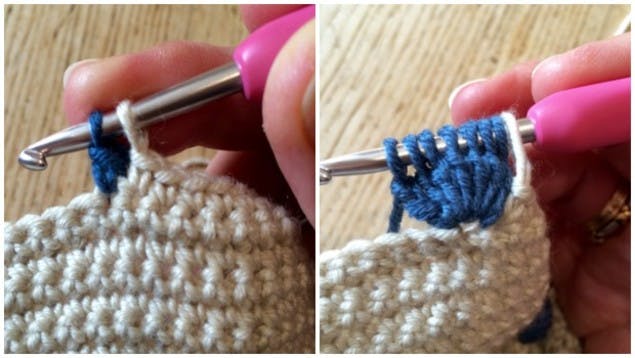
To finish your bobble put your yarn over the hook and pull it though all the other loops left on your hook.
Ch 1 to hold the bobble in place.
Now using the main color again carry on working the correct number of DC between each bobble.
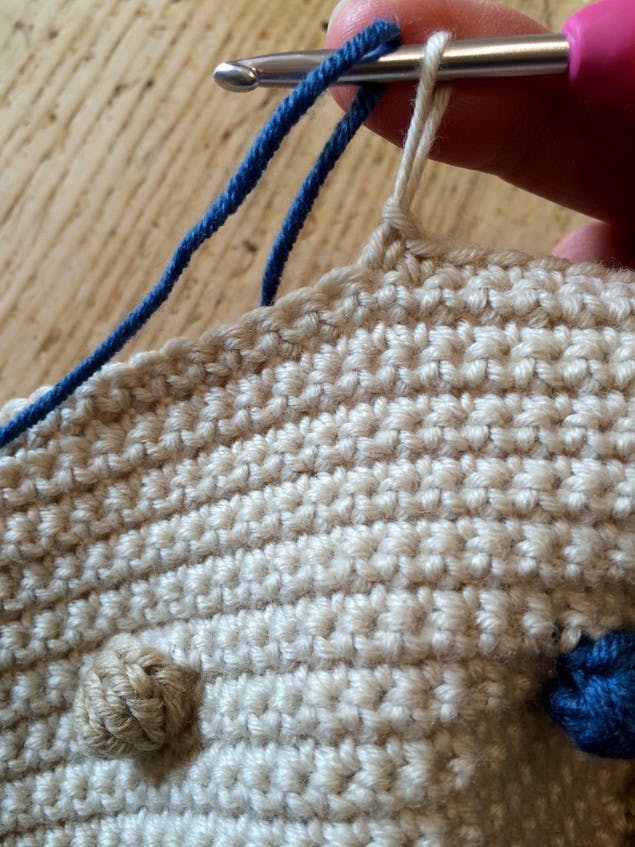
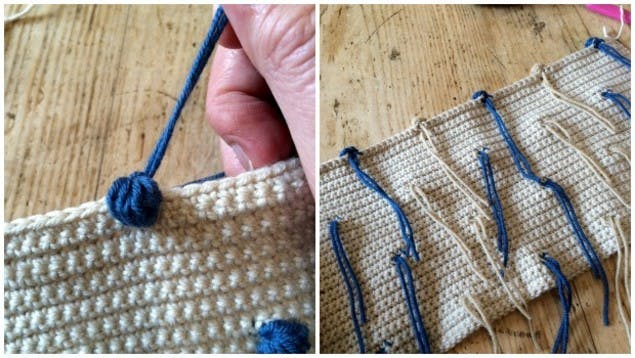
You should find that your bobble automatically pops in to shape but you can give it a helping hand by gently pulling the yarn from behind. Once you have done this, leave a 3-4 cm tail and cut your yarn.
As you continue working your bobble rows you will find the back of your work will have lots of yarn tails hanging from each bobble.
Working the pattern rows
Pattern row 1 (RS): Begin the row with a ch 1.
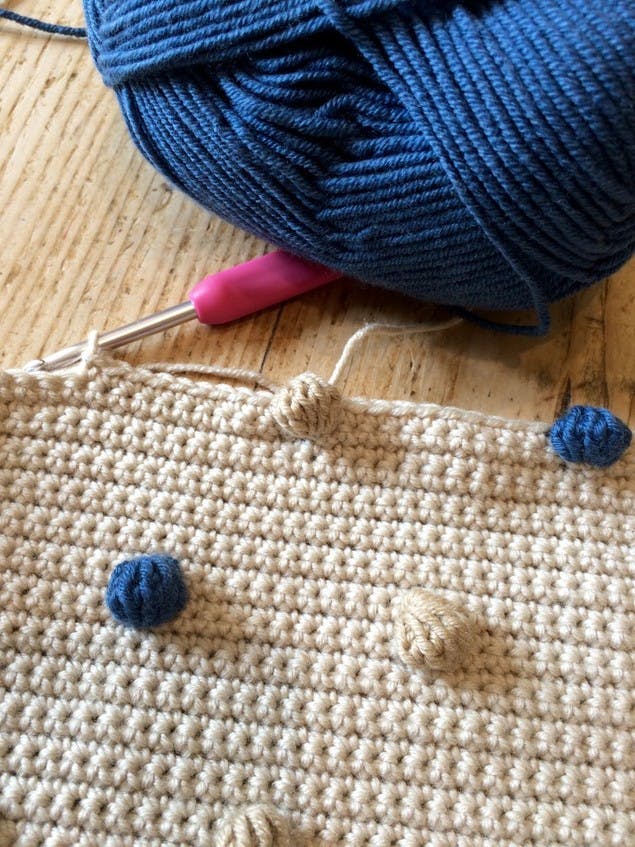
Work 5 DC, make a bobble into the next stitch, DC 11, make a bobble, DC 11, make a bobble, all the way to the end of the row, finishing with 5 DC after your sixth bobble.
Once you have worked pattern row 1 you need to continue in rows of DC (remembering to ch 1 at the beginning of each row).
You will work 11 rows of DC between each pattern row.
Your 12th row will be pattern row 2.
Pattern row 2 (RS): Chain 1, DC 11, make a bobble, DC 11, make a bobble - repeat until the end of the row.
Pro Tip
If you are alternating the color of your bobbles remember to add in the correct color yarn for each new bobble.
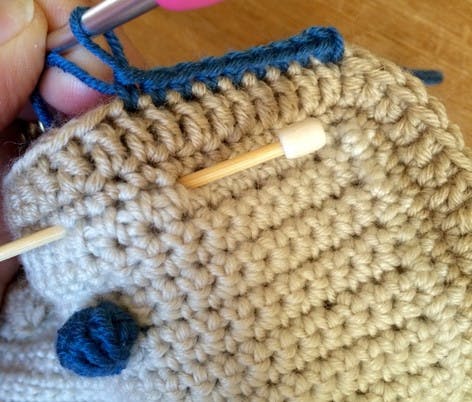
When working your first DC row after each of the pattern rows, work across the row carefully, making sure you work the same number of stitches to keep the row at 71 sts.
Start the row with a ch 1 and work in DC until you reach the back of the bobble.
You will find that you there are 2 sts at the back of each bobble – one at each side of the bobble.
Try to count the stitches on each of the first rows after the bobble rows.
The first stitch at the back of the bobble is your one bobble stitch so don’t count this one, and the second stitch at the back of the bobble counts as the first of your stitches between the bobbles ie. the first of the 11 stitches.
Basic pattern summary
Work 5 DC rows
Pattern row 1
Work 11 DC rows
Pattern row 2
Work 11 DC rows
Pattern row 1
Continue until you have worked 8 rows of bobbles, then work 5 DC rows.
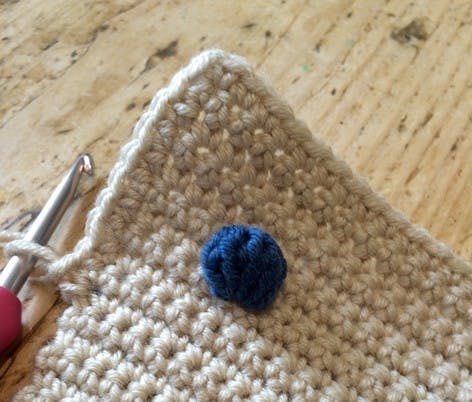
When you get to the end of the final row (RS), don’t turn the work.
Continue working DC all the way around the edge of the entire cover.
Work 2 DC in to each corner stitch to stop the work from getting out of shape.
Work two further edging rounds.
The final edging round around the cushion is going to be a round of trebles with 2 TR in the corner spaces. I worked this in the Stone shade.

At the end of the round, finish off, stand back, and admire your cushion cover front!
Pro Tip
The lovely thing about cushion covers is, that because everything is going to be tucked away inside the finishing off doesn’t need to be quite as invisible. Tie knots at the back of every bobble and anchor the ends by threading them under a couple of stitches with your tapestry needle.
Making the back of the cushion
The back of the cushion cover is made up of two pieces worked separately that slightly overlap each other.
Bottom back piece
Make a starting chain of 73 sts.
Row 1: DC into the second Ch from the hook. (71 sts)
Work approximately 60 rows of DC, remembering to ch 1 at the beginning of each row.
Finish off.
Top back piece
Make a starting chain of 73 sts.
Row 1: DC into the second Ch from the hook. (71 sts)
Work 40 rows of DC remembering to Ch 1 at the beginning of each row.
Row 41 and 42: Change color to the Stone shade and work 2 rows of DC.
Row 43 (buttonhole row): Work 15 DC, Ch 3 and skip the next 3 stitches, DC into the 4th stitch.
DC 15 sts, ch 3, skip 3 stitches, DC into the 4th stitch.
Repeat once more so you have made three buttonholes.
DC 15 to the end.
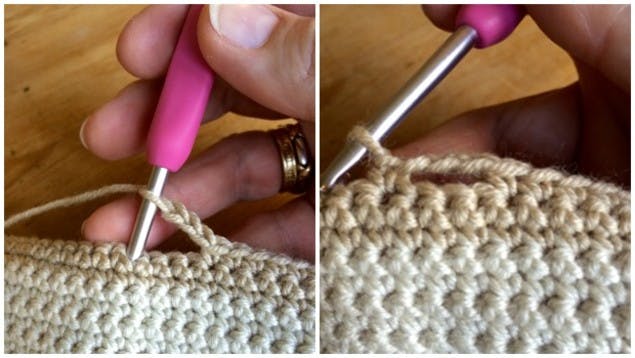
*DC 15 sts, ch 3, skip 3 stitches, DC into the 4th stitch* repeat this until you have made three buttonholes, and DC 15 to the end.
Rows 44 and 45: DC the rows.
I worked row 45 in the Ocean shade.
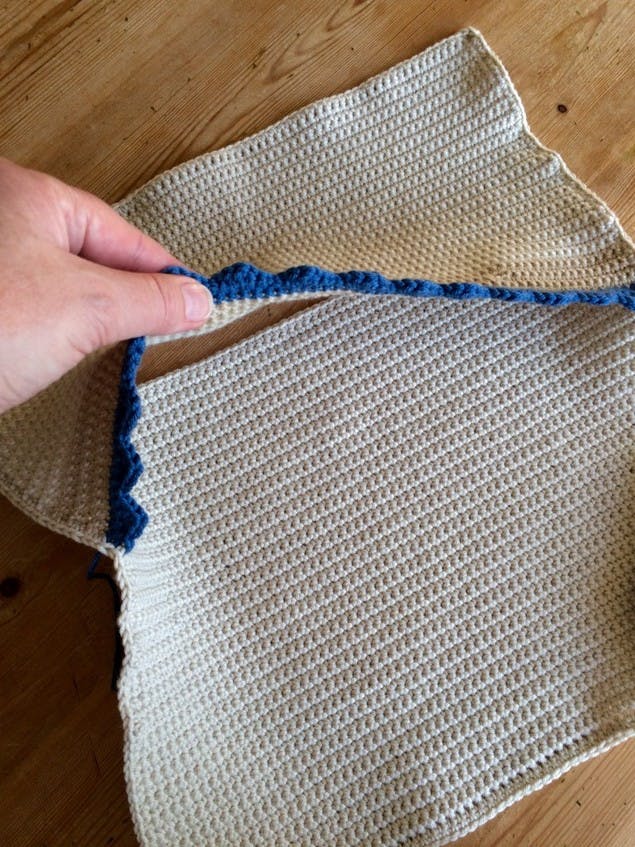
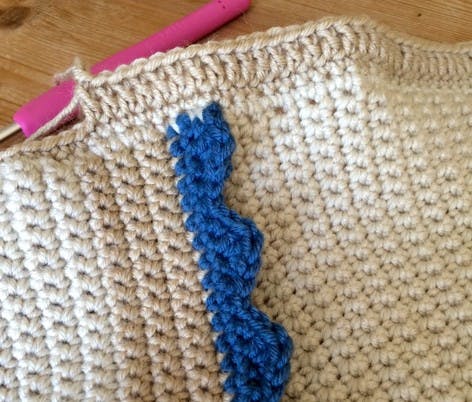
To finish off the buttonhole strip, work one final row of edging in a scallop pattern.
Scallop edging pattern
Starting from the beginning of the row: Sl St 1, DC 1.
Into the next stitch, work 1 HTR, 1 TR and 1 HTR
Work 1 DC into the next stitch, Sl St the next 2 sts and repeat all the way along the row to finish.
Sew the buttons on to the bottom back section in the correct places.

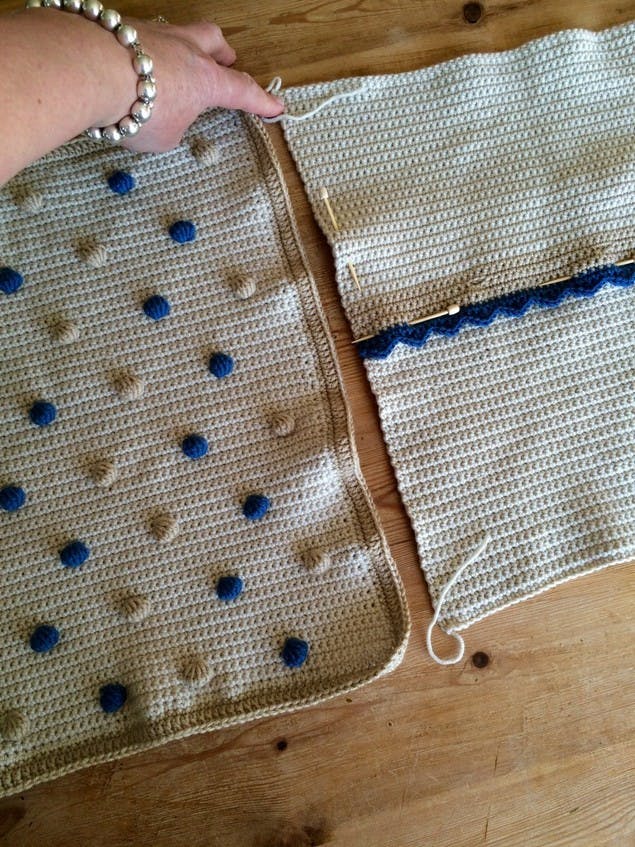
Making up
To join the two back pieces together, lay the two pieces next to the completed front piece and then pin the two overlapping back pieces together to hold them in place.
Edging the back
To make the back match the front, I worked two rows of DC all the way around the edge of the back cushion piece - remember to work 2 DC into the corner stitches!
Crocheting together
Pin the two pieces WS together, and join them by working all the way around with DC (I used the Ocean shade).
For an extra flourish, I added one further round to my cushion in the same scalloped edge as I used on the buttonhole strip!
And there you have it! A stunning, crafty cushion to bring your love of crochet into your home.