Crochet club: Summer nightlight jars
Published on April 15, 2019 By Kate Eastwood 6 min read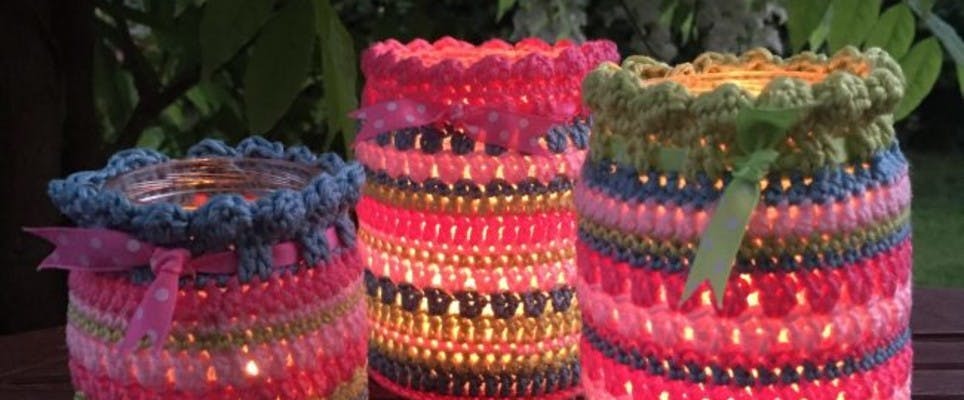
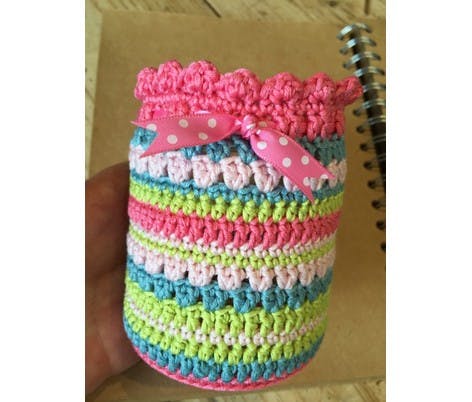
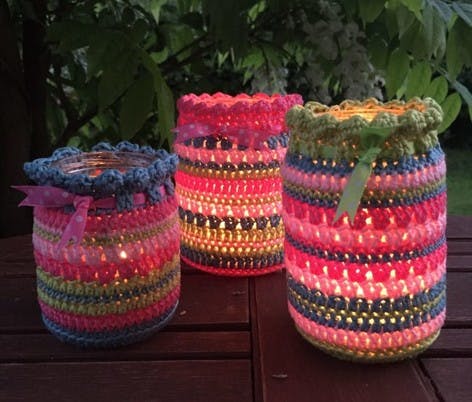
Perfect for summer evenings and delectable dinner tables, Kate Eastwood’s beautiful summer nightlight jar covers are fabulous stashbusters and great fun to make! Remember not to use real candles for your jar covers, instead opt for flame free LED candles - safety first folks!
Materials
- Rico Essentials Cotton DK
- 1 ball each of Pistachio (86), Aqua (95), Fuchsia (14) and Rose (01)
- Clover Amour Aluminum Crochet Hook (14cm)
- Size 2.5mm
- Small lengths of colored ribbons
What better way to recycle your glass jars than to turn them into the prettiest of nightlight candle holders? Whether you are using them for a party, a wedding, or just to brighten up your summer barbecues there is no end to the colors and patterns you can create.
From the 4 balls of yarn I was able to make three covers, with yarn still left to make a fourth.
Abbreviations (UK terminology)
Sts - Stitches
Ch - Chain
DC - Double crochet
TR - Treble crochet
HTR - Half treble crochet
Sl St - Slip stitch
I have written the pattern so that you can adapt it for use with any size glass jar, the only requirement is that the jar has a straight side, rather than a tapered or patterned one. For this pattern and tutorial I used some baby food jars.
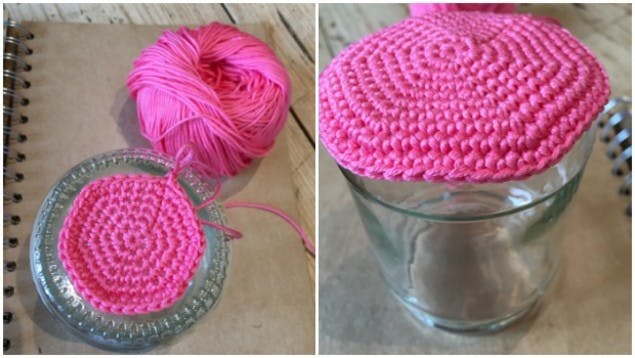
Making the base
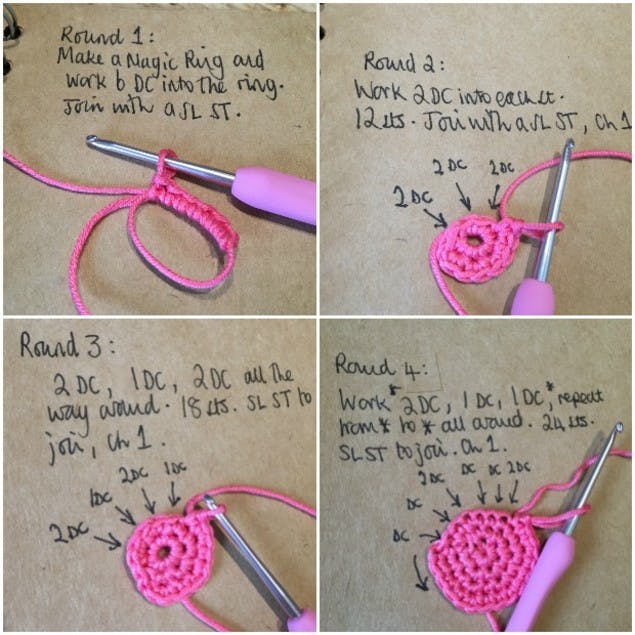
Round 1: Make a Magic Ring and work 6 DC in to the ring.
Sl St to join and Ch 1.
Round 2: Work 2 DC in to each stitch from Round 1 (12 sts)
Sl St to join and Ch 1.
Round 3: *Work 2 DC in to the first stitch and then one DC in to the next stitch*
Repeat from * to *all the way around (18 sts)
Sl St to join and Ch 1.
Round 4: *Work 2 DC in to the first stitch and then one DC in to each of the next 2 stitches*
Repeat from * to* all the way around (24 sts)
Sl St to join, Ch 1.
Round 5: *Work 2 DC in to the first stitch and then one DC in to each of the next 3 stitches*
Repeat all the way around (30 sts)
Sl St to join, Ch 1.
Round 6: *Work 2 DC in to the first stitch and one DC in to each of the next 4 stitches*
Repeat all the way around (36 sts)
Sl St to join, Ch 1.
Pro Tip
You will notice that with each round you always DC 2 in to the first stitch and then work single DC in to the following stitches, with the number of single DC increasing by one with each round. Each round will increase by 6 sts.
As you work, keep placing the crochet base on to the bottom of the jar and continue with the rounds of increases, as above, until your base fully covers the bottom of the jar. When your base generously covers the bottom of the jar work a final round of DC, with no increases.
Your crochet base will now completely cover the bottom of the jar and should be beginning to curve over the edges. Make a note of your stitch count at this point as this will be the number of stitches you work with from now on.
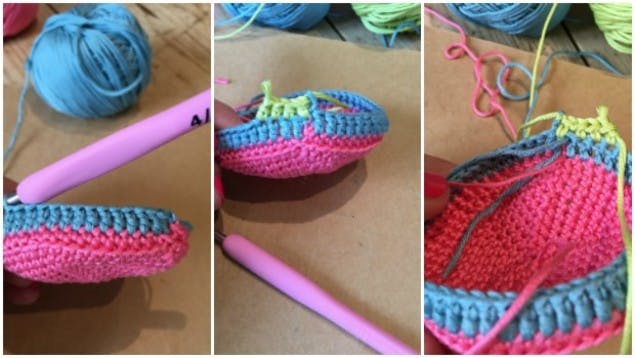
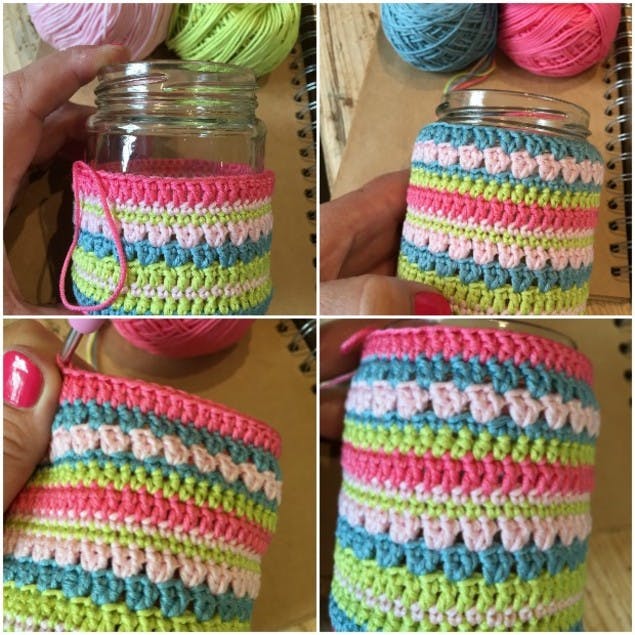
Making the sides

For the next round continue in the same color yarn, and working in to the back loops only, work a round of DC.
Sl St to join and Ch 2.
Pro Tip
By working in to the back loop only you will see that you have created an ‘edge’ that allows your work to continue to grow upwards.
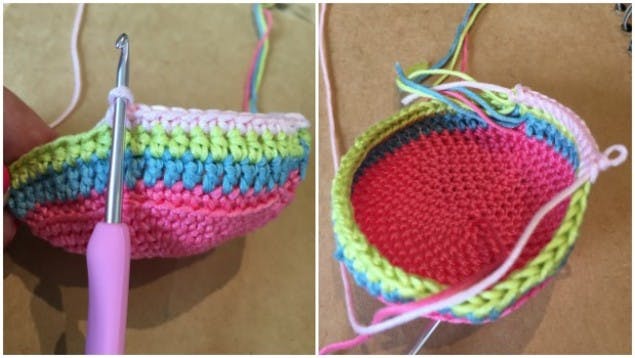
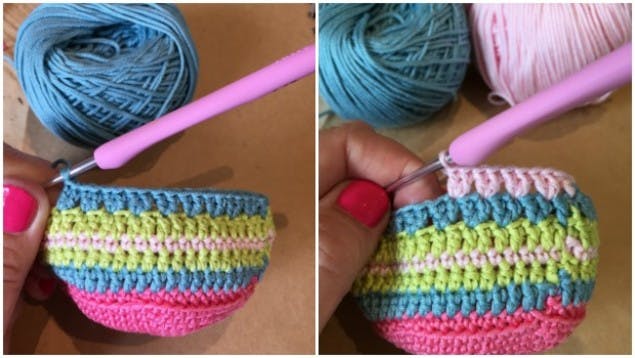
You are now going to start working each round in a different color and stitch pattern, the order of which is entirely up to you. As each round is quite small, and you will be repeating the colors throughout, I found it easiest to leave the yarn attached at the end of each round, rather than cutting them off and sewing them in. This also gives you a flatter joining seam running up the side of your cover, allowing the cover to lie flat against the jar.
The easiest place to join in each new color is when making the chain at the end of each round." - Kate Eastwood
Working the color rounds
I found the easiest place to join in each new color is when making the chain at the end of each round.
Remember to chain 1 at the end of the round if you are going into a round of DC, and chain 2 if you are going into a round of HTR or TR.
For my first pattern round I changed to Aqua and worked a round of TR.
At the end of this round I changed to Pistachio; ch 2 and work a round of HTR.
For my third round I changed to Rose, Ch1 and work a round of DC.
Sl St to join and Ch 2 in your next color.
For my next round I used Aqua again and worked a pattern of TR clusters as follows:
Work a TR in to the same stitch as your chain 2
*skip 1 stitch and then work 2 TR into the next stitch*
Repeat from * to * all the way around.
Sl St to join and chain 2 in your next color.
You are now going to work a repeat of the last round, working your 2 TR cluster in between each cluster from the previous round.
Sl St to join and chain 1 in your next color.
You are now going to work 2 rounds of DC - during these rounds do a quick stitch count to check you still have the correct number of stitches. If you find you are a couple up or down, decrease (DC two stitches together) or increase (work 2 DC in to 1 stitch) accordingly.
That brings you to the end of your pattern repeat. You can now choose whether to continue in the same pattern repeat, to mirror the first block of pattern or to freestyle and do your own thing!
Just remember to join each end of round with a Sl St and change to your new color when making the chains. If you are going in to a DC round, Ch 1, if you are going in to a HTR or TR round, Ch 2.
Color rounds summary
Round 1: TR stitches then Ch 2 at the end of round.
Round 2: HTR stitches then Ch 1 at the end of round.
Round 3: DC stitches then Ch 2 at the end of round.
Round 4: Work 2TR clusters then Ch 2 at the end of round.
Round 5: Work 2TR clusters then Ch 1 at the end of round.
Round 6: DC stitches then Ch 2 at the end of round.
Round 7: DC all stitches.
Pro Tip
The best way to get the height of your cover correct is to keep popping the jar inside the cover and just continue to add further rounds as needed.
When you have got as far as the indent at the top of the jar you now need to work a round of TR.
Sl St and join, Ch 1.
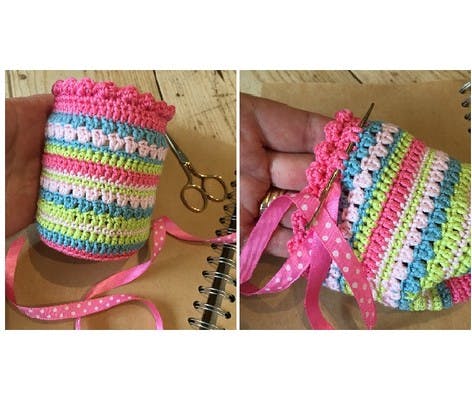
This will be the round that you thread the ribbon through to hold your cover in place.
Work one final round of DC, Ch 1.
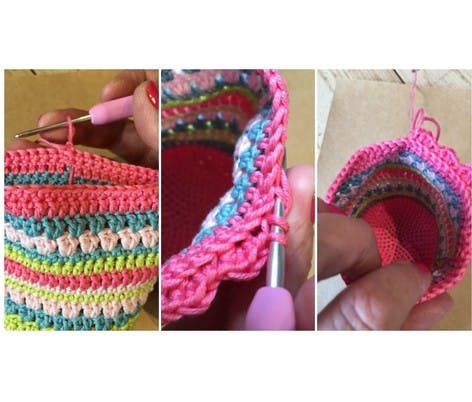
Making the border
Turn your work so that you are now working on the reverse.
Working into the back loop of the stitches only;
DC *skip 1 stitch, work a HTR, TR and HTR all in the next st, Sl St in to the next stitch*
Repeat from * to * all the way around
Join with a Sl St and finish off.
Sew in ends.