Crochet Club: Small drawstring bag
Published on May 28, 2016 By Kate Eastwood
Here comes the sun! Get organised ahead of time and make a gorgeous bobbly drawstring bag and matching sunglasses case from Kate Eastwood! Perfect for summer and weekends away – time to stitch this holiday essential!
Materials
- Cascade Avalon
- 1 skein in Mellow Yellow (11)
- 1 skein in Denim (26)
- KnitPro Waves Crochet Hook
- Sizes 3.5mm AND 4mm
- Paintbox Yarns Simply DK - 10g Mini Ball
- 2 mini-balls in Paper White (100)
- A length of cord
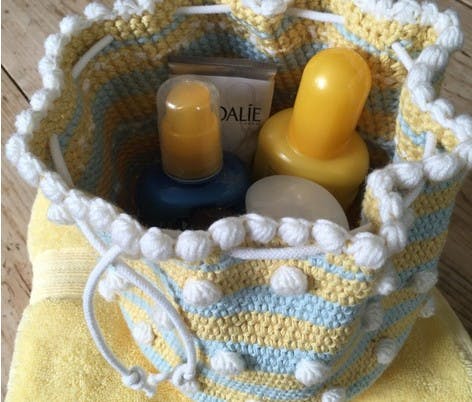
If your household is anything like mine, when there’s packing to be done there are never enough wash bags to go around, let alone spare bags for sun lotions and other essentials like your beach first aid kit! So I made a small drawstring bag that is the perfect size for sun cream, mosquito sprays, after-sun lotions and anything else that might take your fancy – with a matching sunglasses case.
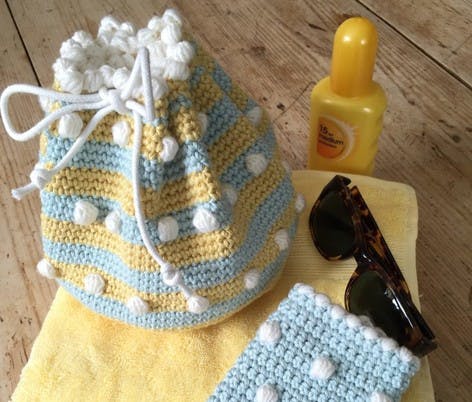
The bag is made with a circular base, and is fastened at the top with a simple drawstring. It also folds flat when empty.
The finished bag measures: Base 13 cm (diameter) x 18cm (height)
This tutorial is written in UK crochet terminology, but you can convert to US using our handy chart in our guide to patterns!
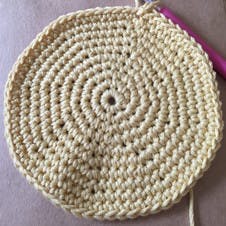
Getting started
Foundation
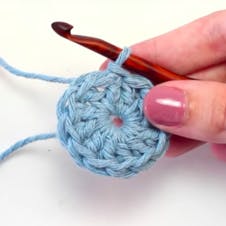
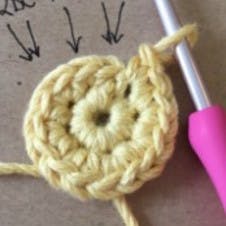
Begin by making a magic ring
Round 1
Work 8 DC into the ring.
SL ST to join
Ch 1
Round 2
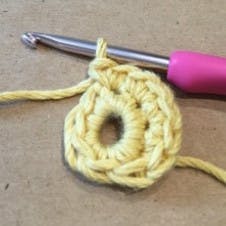
Work 2 DC into each stitch.
16 sts
SL ST to join
Ch 1
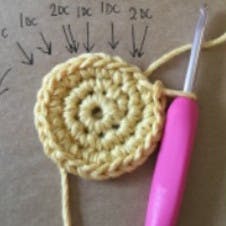
Round 3
Work 2 DC into the first stitch and then 1 DC into the next stitch, all the way around.
24 sts
SL ST to join
Ch 1
Round 4
Work 2 DC into the first stitch and then 1 DC into each of the next two stitches, all the way around.
32 sts
SL ST to join
Ch 1
Round 5
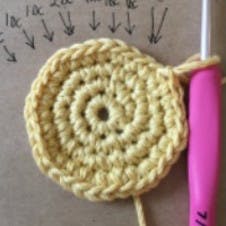
Work 2 DC into the first stitch and then 1 DC into each of the next 3 stitches.
40 sts
SL ST to join
Ch 1
Round 6
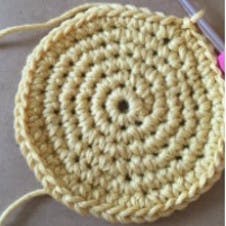
Work 2 DC into the first stitch and 1 DC into each of the next 4 stitches, all the way around.
48 sts
SL ST to join
Ch 1
Round 7
Work 2 DC into the first stitch and 1 DC into each of the next 5 stitches, all the way around.
56 sts
SL ST to join
Ch 1
Round 8
Work a round of DC
56 sts
SL ST to join
Ch 1
Round 9
Work 2 DC into the first stitch and 1 DC into each of the next 6 stitches, all the way around.
64 sts
SL ST to join
Ch 1
Round 10
Work a round of DC
64 sts
SL ST to join
Ch 1
Round 11
Starting the sides: For this round you are going to be working into the back loops only. This will create an ‘edge’ to start the sides of the bag.
Working in DC, and into the back loops only, DC 1, DC 2 into the next stitch, DC 1, DC 2 into the next stitch, repeating this pattern all the way around.
93 sts
Join with a SL ST
Ch 1
Pro Tip
I found it quite useful to mark the end of the round with a stitch marker!
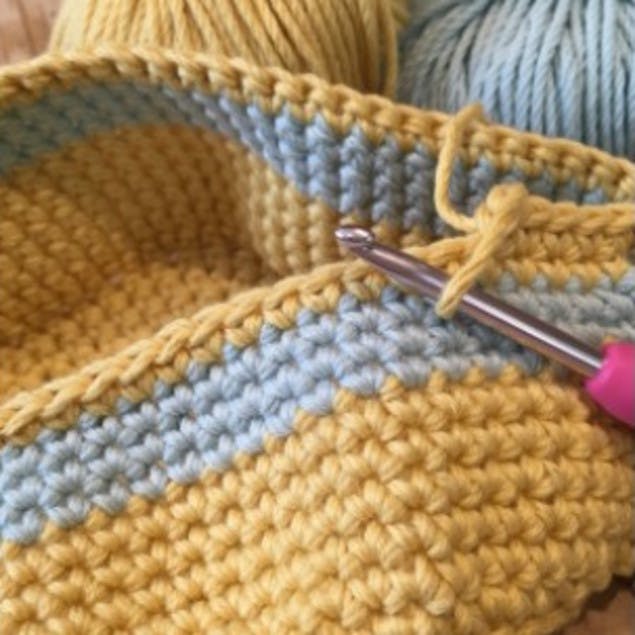
Continuing in DC, work a further 5 rounds. Remember to SL ST to join at the end of each round and chain 1. Your first stitch of each round is worked into the same stitch as the chain 1.
As you work you will see the shape beginning to form.
At the end of the fifth round of yellow change to the second color yarn and work 3 rounds of DC.
After the third round of blue change back to the yellow and work 1 round of DC.
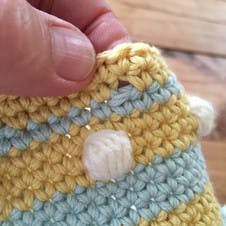
Your next round is going to be the bobble round.
Making a bobble
Join in the white by placing the yarn over the hook, work 7 TR all into the next stitch, leaving the last loop of each TR on the hook.
Yarn over and pull through all 8 loops on your hook, chain 1, yarn over with your main color and DC into the next stitch. After each bobble, cut the yarn leaving a tail long enough to sew in at the end.
Bobble round
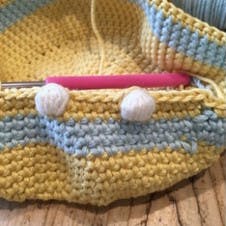
Work 5 DC, make a bobble, work 5 DC, make a bobble.
Repeat all the way around.
After your bobble row, work 1 more round of DC in the yellow.
Change to blue and work 3 rounds of DC.
Change to yellow and work 3 rounds of DC.
Change to blue and work 1 round of DC.
Work a bobble round for the second blue round and then work 1 round of blue.
Continue in this pattern of 3 rounds of each color, with every third block of color having a bobble round in the middle of it.
In total I worked 3 bobble rounds. After the final bobble round, work your third round of yellow.
Finishing the sides
Eyelets: Work 1 round in blue.
Change to yellow and work as follows:
*DC 5, chain 1, skip a stitch, rejoin yarn to work* Repeat from * to *
For your final round, continue working in the yellow and work a round of DC, working into each chain stitch from the previous round.
Finish off and sew in all your ends.
Thread your cord through the eyelets.
Working the border
You are now going to work your border of puff/bobble stitch!
Using the white DK yarn and a 3.5mm hook. With the RS of the work facing you, join your yarn into the back of your bag, on the left hand side of your joining seam (this round is worked on the reverse, but when you turn it around you will see that the bobbles are on the correct side). Work a DC.

Making the puff stitch bobble
Yarn over and pull up to roughly TR height.
Repeat this 4 more times all into the same stitch, yarn over and pull through all the loops on your hook.
Chain 1, SL ST in to the next stitch.
Work another puff bobble into the next stitch.
Repeat the pattern *one puff bobble, one SL ST* all the way around the top of the bag.

Once you have finished your bag the only thing left to do is to fill it!" – Kate Eastwood