Crochet animal taggies
Published on September 16, 2019 2 min read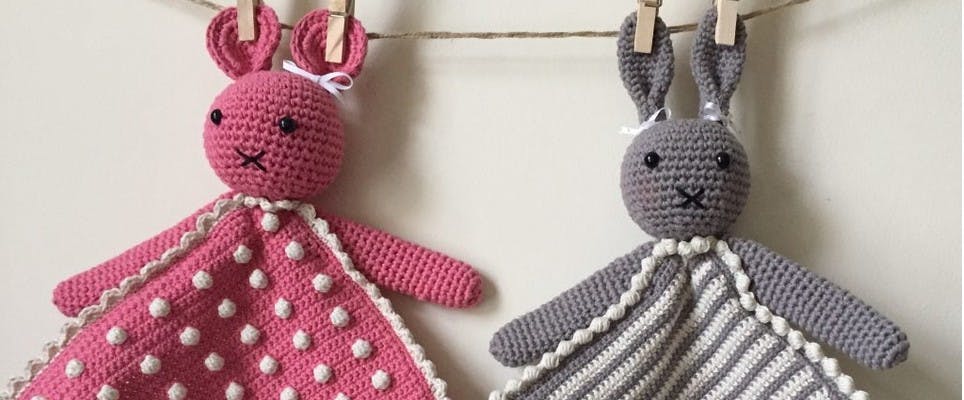
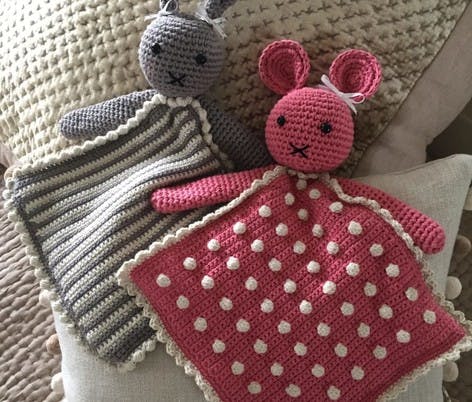
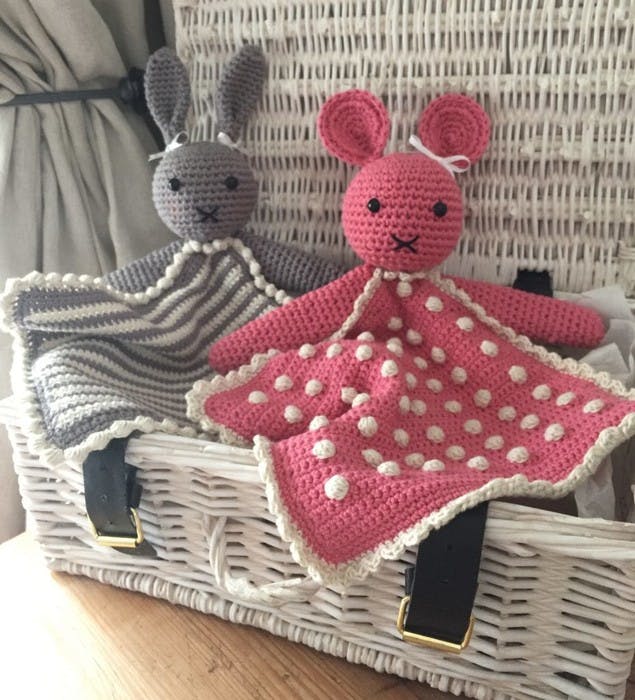
Craft the perfect travel companion for your little one! These taggy blankets are small, soft and with their squidgy heads and arms, are ideal for little fingers to hold on to when out and about. Kate Eastwood shows how to crochet your own cute taggy mouse and rabbit in this super easy step-by-step tutorial.
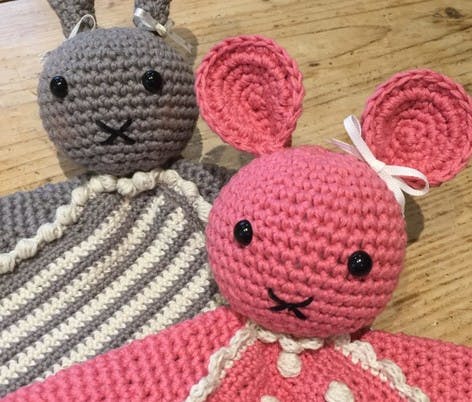
There’s something special about that toy that gets carried everywhere by a toddler. These little animal taggy blankets fit that bill perfectly, ideal for day trips, travel or just accompanying your little one around the house. The blanket part is soft and light enough to be gripped by the very smallest of hands while cute face and ears give heaps of character. There are lots of different textures to each toy and the little soft arms are perfect for wrapping tiny fingers around.
It’s also fully washable – and heaven forbid it should ever get lost – another one can very quickly be hooked up before bedtime should the need arise!
I have made mine in two different colorways and patterns but both are made with the same basic pattern.
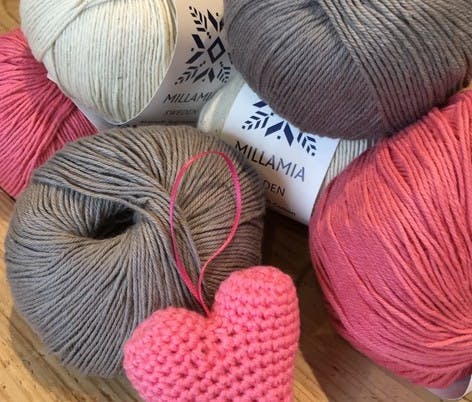
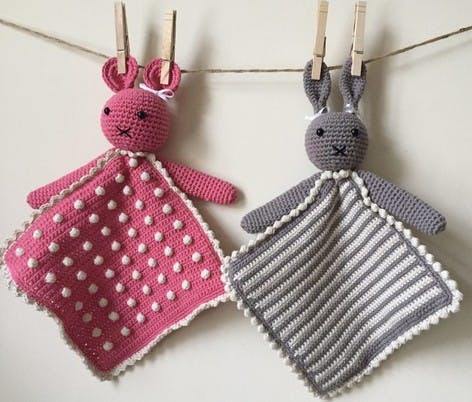
For my yarn I used Millamia Naturally Soft Cotton. For the rabbit I used 2 x balls of Mid Grey 301 and 1 x ball of Off White 311 and for the mouse I used 2 x balls of Candy Pink 340 and 1 x ball of Off White 311.
You will also need some toy stuffing and two 6 mm safety eyes, or black thread to embroider the eyes.
To give a soft drape the blanket square is worked in simple SC, using 1 strand of the yarn and a 3mm hook. The head and ears are worked using 2 strands of the yarn and a 3.5 mm hook.
Materials
- MillaMia Naturally Soft Cotton
- Trimits Toy Stuffing - 200g
- KnitPro Waves Crochet Hook
- Trimits Toy Eyes Solid Black
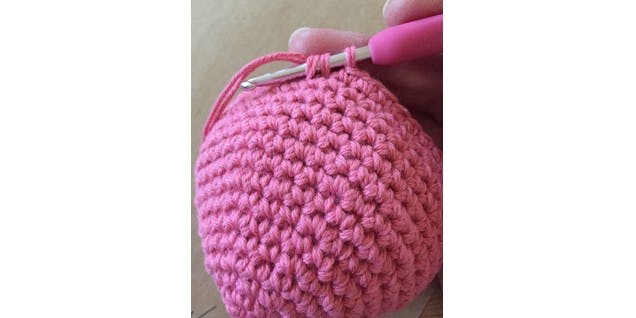
The head is made in a continuous round and worked with 2 strands of the colored yarn and a 3.5mm hook.
To make the head
1
Round 1: Work a Magic Ring and work 4 SC in to the ring.
2
Round 2: Work 2 SC in to each stitch from the Round 1, 8 sts.
3
Round 3: Work 2 SC in to each stitch from Round 2, 16 sts.
4
Round 4: Work a round of SC, 16 sts.
5
Round 5: *Work 1 SC in to the first stitch, followed by 2 SC in to the next stitch*. Repeat from * to *all the way around, 24 sts.

6
Round 6: Work a round of SC, 24 sts.
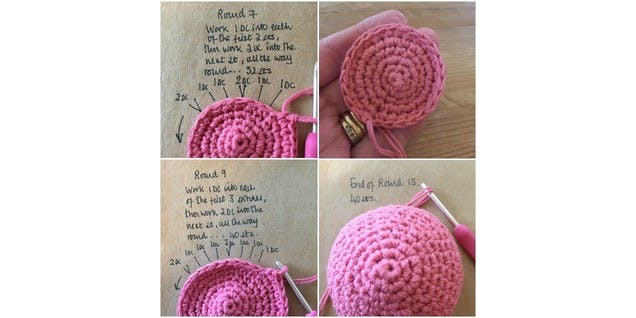
7
Round 7: *Work 1 SC in to each of the first two stitches, followed by 2 SC in to the next stitch*. Repeat from * to *all the way around, 32 sts.
8
Round 8: Work a round of SC, 32sts.
9
Round 9: *Work 1 SC in to each of the first three stitches, followed by 2 SC in to the next stitch*. Repeat from * to *all the way around, 40 sts.
10
Rounds 10 to 15: Work a round of SC, 40sts.
11
You are now going to start working some decreasing rounds to form the shape of the head.
Round 16: *Decrease 2 stitches by working the first two SC stitches together, work a SC in to each of the next 3 stitches*. Repeat from * to * all the way around, 32 sts.
12
Round 17: Work a round of SC, 32 sts.
13
Round 18: *Decrease 2 stitches by working the first two SC stitches together, work a SC in to each of the next 2 stitches*. Repeat from * to * all the way around, 24 sts.
14
Round 19: Work a round of SC, 24 sts.
15
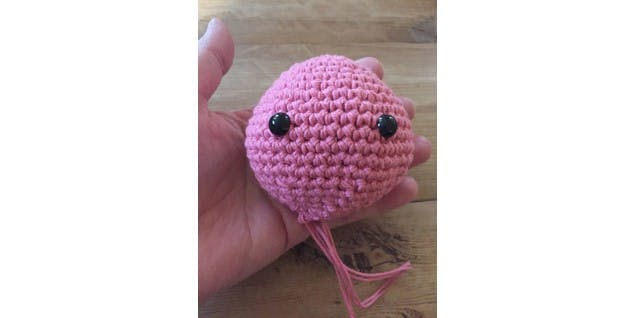
At this stage attach the two safety eyes and stuff the majority of the head.
16
Round 20: *Decrease 2 stitches by working the first two SC stitches together, work a SC in to the next stitch*. Repeat from * to * all the way around, 16sts.
17
Round 21: Decrease 2 stitches together all the way around, 8 sts. Add the final stuffing as required. Do not finish off at this point but leave a long tail of yarn to finish off later and sew the head closed.
To make the mouse ears (make 4)
1
Work as for the head up to and including Round 5.
2
For each ear lace two of the circles together, WS together, and SC all the way around the edge.
3
Finish off leaving a long tail of yarn to sew the ears to the head.
To make the bunny ears (make 2)
1
Round 1: Make a Magic Ring and work 6 SC in to the ring.
2
Round 2: *Work 1 SC in to the first stitch , followed by 2 SC in to the next stitch*. Repeat from * to * all the way around, 9 sts.
3
Round 3: Work a round of SC, 9 sts.
4
Round 4: *Work 1 SC in to the first stitch , followed by 2 SC in to the next stitch*. Repeat from * to * 4 times, 13 sts.
5
Work a further 12 rounds of 13 sts. Finish off, leaving a long tail of yarn for sewing the ears to the head.
To make the mouse blanket
1
Using 1 strand of the yarn and a 3mm hook loosely work a chain of 46.
2
SC in to the 2nd CH from the hook and work in SC to the end of the row. CH 1 and turn.
3
Work a further 4 rows in SC, remembering to CH 1 at the end of each row and turn.
4
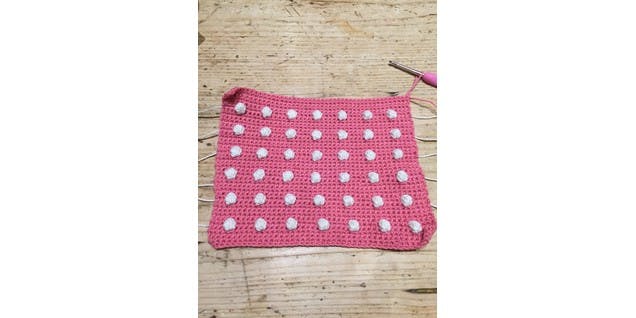
Row 5 is your first bobble row.
5
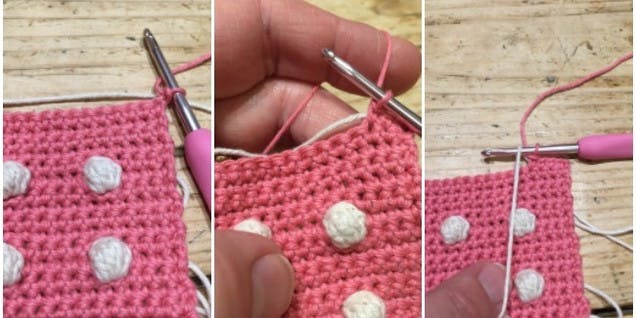
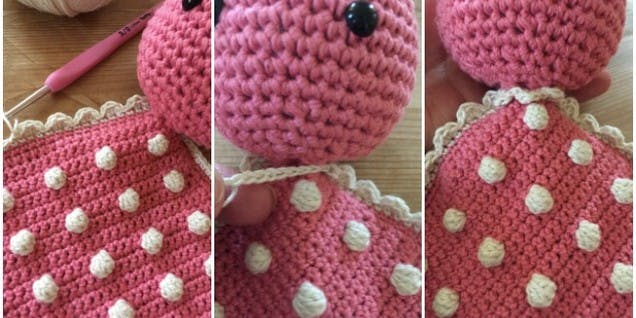
Work as follows: Joining your Off White in at the beginning of the row SC 5, make a bobble with the cream, SC 5, make a bobble and so on until the end of the row.
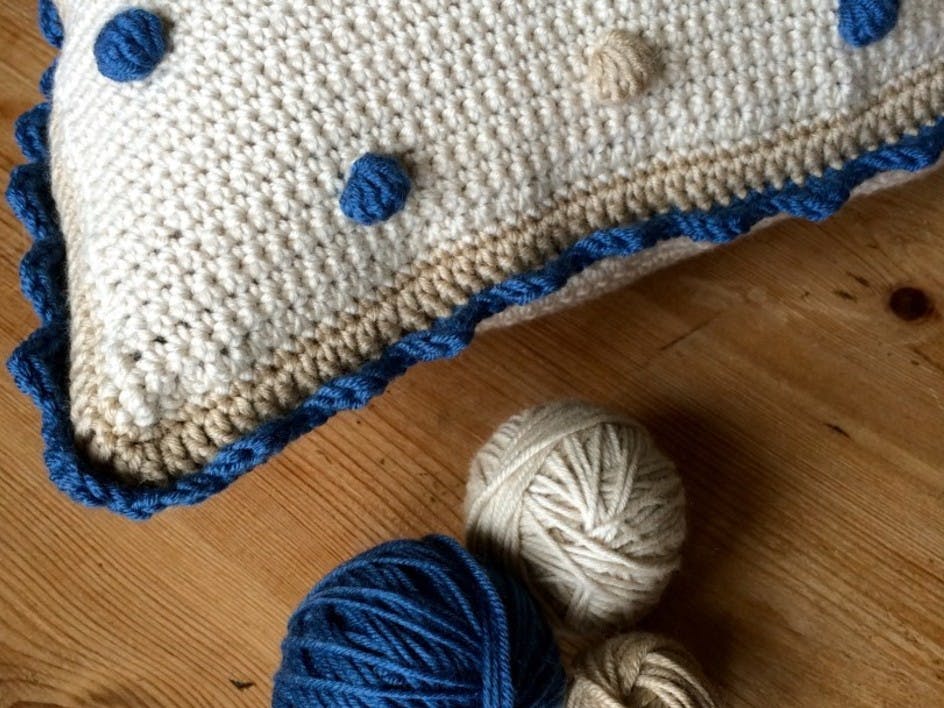
To make a bobble
1
As your bobbles are worked in a different color join your bobble color in at the beginning of the bobble row by laying it along the top of the row and holding it in place as you crochet.
2
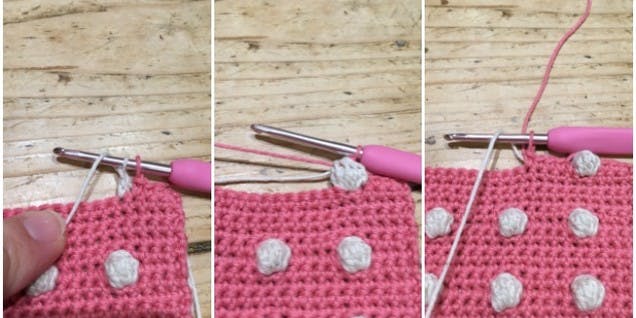
SC 5 in your main color, bring the cream yarn up and work 5 DC in to the next ST, leaving the last loop of each DC on the hook. You will then have 6 loops on your hook. After the 5th DC yarn over with the pink yarn and pull through all of the loops to close up your bobble. Work 5 SC in pink and then work your 2nd bobble. Continue all the way along the row.
3
Work 8 bobble rows.

4
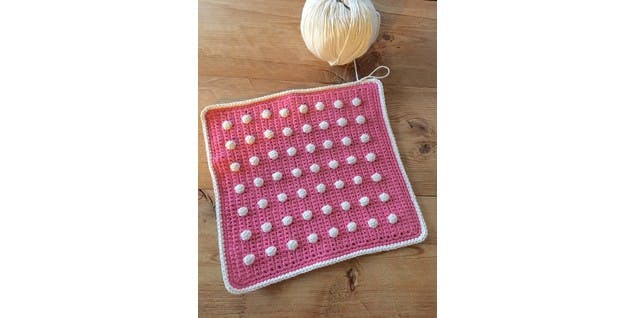
Work 4 further rows of SC.
5
At the end of your final row ( RS) continue on at the end of the row , working 2 to 3 stitches in the corner, and then carry on working a round of SC all the way around the edge of the blanket. Sl St to join when you get back to the beginning. Finish off and sew in the ends.
6
Now join in your Off White yarn and work a further round of SC all the way around the edge of the blanket, working 2 to 3 SC in to each corner stitch to make sure the blanket keeps it shape.
To make the rabbit blanket
1
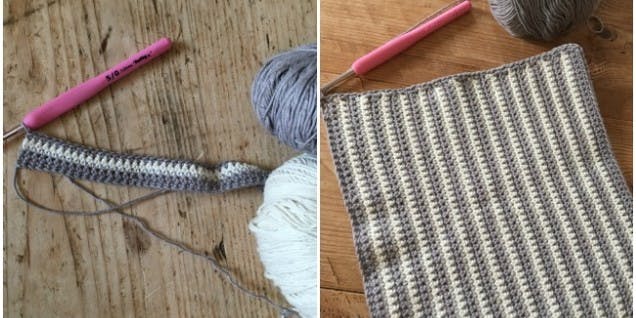
Using 1 strand of the yarn and a 3mm hook loosely work a chain of 46.
2
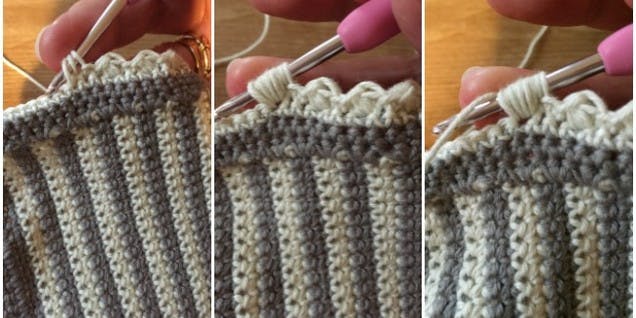
SC in to the 2nd CH from the hook and work in SC to the end of the row. CH 1 and turn. To create the stripes I worked 3 stripes of each color. Rather than cutting the yarn at the end of each color change I looped the yarn up the side of the blanket, as this can then be closed in when working the final border.
3
Work a total of 54 rows.
4
At the end of your final row (RS) continue on at the end of the row, working 2 to 3 stitches in the corner, and then carry on working a round of SC all the way around the edge of the blanket. Sl St to join when you get back to the beginning. Finish off and sew in the ends.
5
Now join in your Off White yarn and work a further round of SC all the way around the edge of the blanket, working 2 to 3 SC in to each corner stitch to make sure the blanket keeps it shape.
To make the arms
1
Make 2 (Using 2 strands of yarn and a 3.5mm hook)
Round 1: Make a Magic Ring and work 6 SC in to the ring.
2
Round 2: Work 2 SC in to each stitch from Round 1, 12 sts.
3
Work a further 29 rounds of 12 SC. Finish off, leaving a long tail of yarn top sew the arms on to the taggy blanket.
Joining all the parts of the Taggy together
1
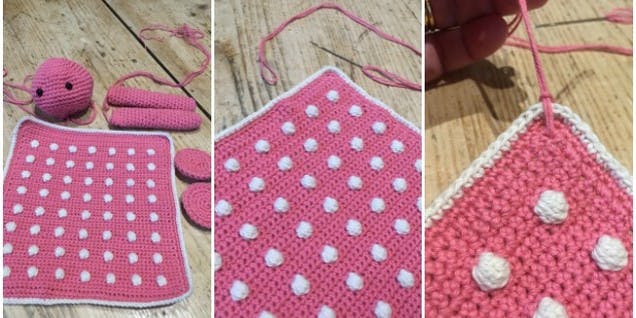
For each taggy you should now have a head, a blanket, two arms and two ears.
2
To complete your Taggy you just need to add your finishing border.
Add your finishing border
1
For my mouse I worked a scalloped border as follows: *Work a SL ST, into the next stitch work a HDC, SC and HDC, SL ST in to the next stitch.* Repeat from * to * all the way around. At the end of the round work a chain long enough to make an edge under the head. Work scallops in to the chain, stitch in place. Finish off and sew in the ends. Once your border is complete sew the arms in place by attaching them to the back of the head and blanket.
2
For my rabbit border I worked a small bobbled edge as follows: *With the WS facing SL ST, yarn over and pull up the loop five times, yarn over and pull through all the loops on the hook, SL ST in to the next stitch.* Repeat from * to * all the way around. At the end of the round work a chain long enough to make an edge under the head. Work bobbles in to the chain, stitch in place. Finish off and sew in the ends.
3
Once your border is complete sew the arms in place by attaching them to the back of the head and blanket.
There you have it! Your taggy is ready to go. Making for a little person in your world? Taggies make wonderful gifts whether it's a precious keepsake, stocking filler, birthday, Christening present or just because...